TL;DR
In this post I show how to use a state-of-the-art machine learning model to implement Salient Object Detection and Image Segmentation. I then show how this model can be used to provide local inference capabilities entirely within a UWP app.
Intro
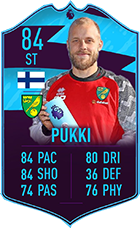
A while ago I found myself prototyping a UI in which I wanted to show portrait images of people. However, I wanted to remove the background from these portrait images so that they appeared integrated into the UI rather than layered on top of it. For example, something like this Premier League Player of the Month card:
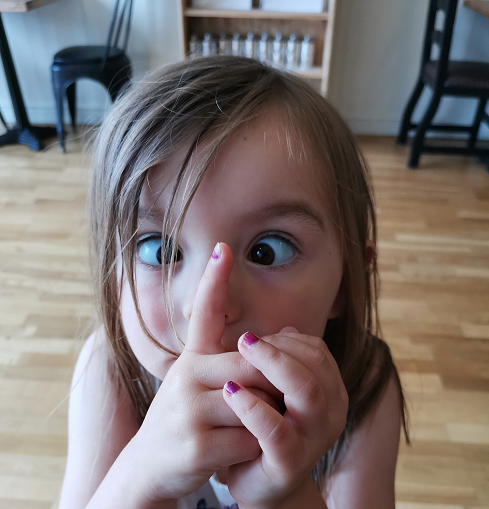
Looking around I came across this website which purported to use "sophisticated AI technology to detect foreground layers and separate them from the background". Intrigued I gave it a go and was shocked at how good the results were. Here's an image of my little girl (endeavouring to learn how to go cross-eyed) followed by the image produced by Remove.bg:
 |
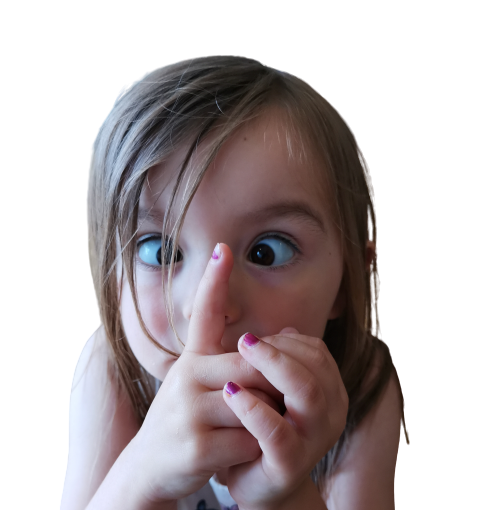 |
| Original | Background Removed |
Very cool and easily integrated using their API.
Unfortunately my use-case required background removal from user supplied content and the project costing probably wouldn't extend to paying for (potentially) thousands of calls a month.
So, like any good hacker, I hit the books to learn how this "sophisticated AI" worked...
Salient Object Detection & Image Segmentation
A thoroughly enjoyable couple of hours study commenced whereupon I learned of the wonders of Salient Object Detection and Image Segmentation.
During this research I happened upon U²-Net, a very recently published (May 2020) "deep network architecture" for salient object detection. In this repository they provided everything needed to start using their model including all weights and even sample code for inference. Moreover this model had already been used to great effect in the "AR Cut & Paste" demo shown below (link here for Firefox users (like me) who don't see the tweet embedded correctly):
4/10 - Cut & paste your surroundings to Photoshop
— Cyril Diagne (@cyrildiagne) May 3, 2020
Code: https://t.co/cVddH3u3ik
Book: @HOLOmagazine
Garment: SS17 by @thekarentopacio
Type: Sainte Colombe by @MinetYoann @ProductionType
Technical Insights: ↓#ML #AR #AI #AIUX #Adobe #Photoshop pic.twitter.com/LkTBe0t0rF
I was inspired. I wanted that tech in my product. But how?
The "Easy" Way
In this day and age we, as developers, are somewhat spoiled. Once you understand enough about what it is you need to be able to ask the right questions, you can almost guarantee that someone out there has already posted the answers. This is very much why I endeavour to document my continued learnings on this blog; a sort of "pay-it-forward" thank-you for all the myriad blogs and SO answers I've benefitted from across the years.
Anyway, once I knew I wanted to use U²-Net, it didn't take me long to find a docker image which provided an Http endpoint for performing U²-Net inference on a supplied image and which returned the supplied image with the background removed. Perfecto!
Unfortunately, trying to run this docker image caused an error. Looking at the Dockerfile in the associated Github repository explained why: the PyTorch image on which this docker image was based expected to have CUDA hardware available to it. As I was running on Windows, with the docker container running within WSL2 (and didn't want to go back to running a Fast Ring build) this docker image was of little direct use.
However, given the Dockerfile provided a good breakdown of all the software required to get U²-Net running, it wasn't rocket science (but perhaps artificial brain surgery?) to write a new Dockerfile which limited PyTorch to only using cpu inference. Spinning this up provided me a local (and free!) endpoint which could take my original sample image and return one with the background removed as shown below:
|
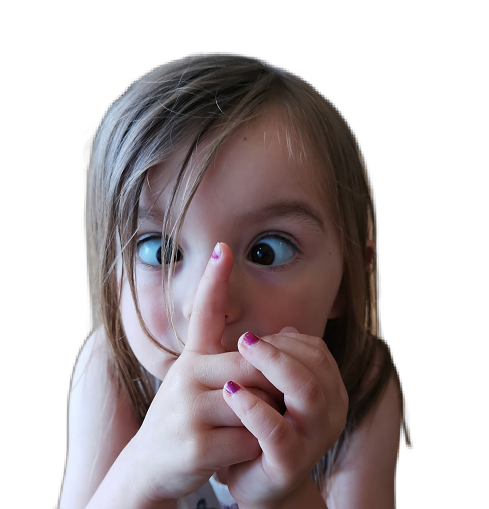 |
| Original | U²-Net Result |
For some this would be enough and, accordingly, I pushed the docker image and associated repository for others to use (please star them should you find them useful/helpful).
But... why pay for docker instance hosting when my users could perform the inference on their own machines from within a UWP app?
The "Hard" Way
For those that are unaware, Windows actually ships with strong support for machine learning in UWP via the Windows.AI.MachineLearning namespace. Using the types provided here, a developer is able to load and perform inference using ONNX (Open Neural Network eXchange) models (up to version 1.4 -opset 9) in a (relatively) straight forward manner.
However, in accordance with their strategy of decoupling core technologies from releases of the OS, Microsoft have recently shifted development toward the open-source Microsoft.AI.MachineLearning nuget package. This package can can be installed on any recent build of windows (I believe back to 18362) and provides compatibility for the very latest ONNX models (versiol 1.7 - opset 12).
Given, PyTorch (the ML framework used for U²-Net) has strong support for exporting to ONNX, my challenge was clear:
- Export a fully weighted U²-Net model from PyTorch to ONNX.
- Use the Microsoft.AI.MachineLearning package to load the ONNX model.
- Write code to process a source image into U²-Net's input tensor.
- Use the ONNX model to perform inference on the input image.
- Write code to process a result image using U²-Net's output tensor as an alpha channel.
- Test
Now, while none of these tasks are super-difficult, you will need to be fairly analytical as they involve interpreting Python code (along with lots of Python packages) and byte bashing pixel data to/from 4 dimensional arrays.
Exporting from PyTorch to ONNX
Given we already have a docker image that has everything needed to perform inference using U²-Net, I am going to use this image to export the ONNX model. This can be achieved by running the docker image and overriding the entry-point such that we get access to a command prompt; like so:
docker run -it --entrypoint /bin/bash ibebbs/u2net-http
Once we have access to a command prompt within the container, we can use Python interactively to load and export the ONNX model. So, from the container's command prompt, start Python (in the U-2-Net directory) by running:
cd U-2-Net
python3
This will land you at the Python command prompt >>> from which we can follow the steps in u2net.py to load the model as shown below (many of these imports are unnessary but it was just easier to include them all):
import sys
sys.path.insert(0, 'U-2-Net')

from skimage import io, transform
import torch
import torchvision
from torch.autograd import Variable
import torch.nn as nn
import torch.nn.functional as F
from torch.utils.data import Dataset, DataLoader
from torchvision import transforms

from torch.utils.data import Dataset, DataLoader

import numpy as np
from PIL import Image

from data_loader import RescaleT
from data_loader import ToTensorLab

from model import U2NET

model_dir = './saved_models/u2net/u2net.pth'
net = U2NET(3, 1)
net.load_state_dict(torch.load(model_dir, map_location=torch.device('cpu')))
At this point we have the net variable loaded with the U²-Net architecture and weights from "u2net.pth". Now we need to export this variable as an ONNX model.
Fortunately, PyTorch has some excellent documentation for exporting ONNX (for example here and here) which made exporting the model fairly trivial:
import torch.onnx
dummy_input = torch.randn(1, 3, 320, 320, device='cpu')
input_names = [ "input" ]
output_names = [ "o0", "o1", "o2", "o3", "o4", "o5", "o6" ]
torch.onnx.export(net, dummy_input, "u2net.onnx", export_params=True, opset_version=12, input_names=input_names, output_names=output_names)
Here we create a random dummy input, name the input and output tensors and then export the model to ONNX using the latest operator set (opset_version=12).
This will take a few seconds and you might see a few warnings about various functions having been deprecated but, once complete, if you exit interactive Python (using exit()) and return to the container's command prompt, you should be able to see a "u2net.onnx" file in the directory as shown below:
>>> exit()
root@88fa6881c8ea:/app/U-2-Net# dir
LICENSE    __pycache__     figures  saved_models  u2net.onnx     u2net_train.py
README.md  data_loader.py  model    test_data     u2net_test.py
You now need to extract the "u2net.onnx" from the container. There are many ways to do this, for me the easiest was to use "secure copy" to transfer the file to my machine, but do whatever is easiest for you.
Load the ONNX model from a UWP app
With the "u2net.onnx" model in hand, we're now going to use the Microsoft.AI.MachineLearning package to load the model in preparation for running inference.
Before we create the UWP app though, we're going to install the "Windows Machine Learning Code Generator" extension which automatically scaffolds code for interacting with an ONNX model and makes getting started with ML super-easy. So, start VS and install the extension before continuing to the next step (if you're not using VS or would prefer not to install the extension, you can simply copy the file generated in the next step from here.
Now, from Visual Studio and with the extension installed, create a new UWP project - I named mine "UwpMl" - and add the "u2net.onnx" model to the Assets folder. As you do so, you should see that a "u2net.cs" file is also added to the project thanks to the "Windows Machine Learning Code Generator" extension. Opening this file should show class definitions similar to the following:
// This file was automatically generated by VS extension Windows Machine Learning Code Generator v3
// from model file u2net.onnx
// Warning: This file may get overwritten if you add add an onnx file with the same name
using System;
using System.Collections.Generic;
using System.Threading.Tasks;
using Windows.Media;
using Windows.Storage;
using Windows.Storage.Streams;
using Windows.AI.MachineLearning;
namespace UwpMl
{

    public sealed class u2netInput
    {
        public TensorFloat input; // shape(1,3,320,320)
    }

    public sealed class u2netOutput
    {
        public TensorFloat o0; // shape(1,1,320,320)
        public TensorFloat o1; // shape(1,1,320,320)
        public TensorFloat o2; // shape(1,1,320,320)
        public TensorFloat o3; // shape(1,1,320,320)
        public TensorFloat o4; // shape(1,1,320,320)
        public TensorFloat o5; // shape(1,1,320,320)
        public TensorFloat o6; // shape(1,1,320,320)
    }

    public sealed class u2netModel
    {
        private LearningModel model;
        private LearningModelSession session;
        private LearningModelBinding binding;
        public static async Task<u2netModel> CreateFromStreamAsync(IRandomAccessStreamReference stream)
        {
            u2netModel learningModel = new u2netModel();
            learningModel.model = await LearningModel.LoadFromStreamAsync(stream);
            learningModel.session = new LearningModelSession(learningModel.model);
            learningModel.binding = new LearningModelBinding(learningModel.session);
            return learningModel;
        }
        public async Task<u2netOutput> EvaluateAsync(u2netInput input)
        {
            binding.Bind("input", input.input);
            var result = await session.EvaluateAsync(binding, "0");
            var output = new u2netOutput();
            output.o0 = result.Outputs["o0"] as TensorFloat;
            output.o1 = result.Outputs["o1"] as TensorFloat;
            output.o2 = result.Outputs["o2"] as TensorFloat;
            output.o3 = result.Outputs["o3"] as TensorFloat;
            output.o4 = result.Outputs["o4"] as TensorFloat;
            output.o5 = result.Outputs["o5"] as TensorFloat;
            output.o6 = result.Outputs["o6"] as TensorFloat;
            return output;
        }
    }
}
Well, there you go. By just adding the "onnx" file to the project, we now have a "u2netModel" which is able to load the model (CreateFromStreamAsync) and use it to perform inference (EvaluateAsync).
However, we should note the using Windows.AI.MachineLearning; line. As discussed earlier, the "Windows.AI.MachineLearning" namespace is included as part of recent builds of Windows and, while it allows us to use ONNX models without any additional packages, it only supports ONNX models up to version 1.4 (opset 9). Given we exported the ONNX model for U²-Net using opset 12 we need to migrate to using the more recent "Microsoft.AI.MachineLearning" package. Fortunately this is very straight forward and simply involves installing the "Microsoft.AI.MachineLearning" nuget package into the project then changing the above using clause to using Microsoft.AI.MachineLearning. Everything else remains the same.
Next we'll implement a UI which will allow us to load the image on which we want to perform inference and which will display both input and output images. For simplicity, we'll eschew MVVM and use the code-behind file for "MainPage" to implement this functionality.
So, in "MainPage.xaml", add the following:
<Page
    x:Class="UwpMl.MainPage"
    xmlns="http://schemas.microsoft.com/winfx/2006/xaml/presentation"
    xmlns:x="http://schemas.microsoft.com/winfx/2006/xaml"
    xmlns:local="using:UwpMl"
    xmlns:d="http://schemas.microsoft.com/expression/blend/2008"
    xmlns:mc="http://schemas.openxmlformats.org/markup-compatibility/2006"
    mc:Ignorable="d"
    Background="{ThemeResource ApplicationPageBackgroundThemeBrush}">

    <Grid>
        <Grid.RowDefinitions>
            <RowDefinition Height="0.6*"/>
            <RowDefinition Height="0.3*"/>
            <RowDefinition Height="Auto"/>
        </Grid.RowDefinitions>
        <Grid.ColumnDefinitions>
            <ColumnDefinition Width="0.5*"/>
            <ColumnDefinition Width="0.5*"/>
        </Grid.ColumnDefinitions>
        <Image Grid.Column="0" Source="/Assets/Checkerboard.png" Width="320" Height="320" Stretch="UniformToFill" HorizontalAlignment="Center" VerticalAlignment="Center" />
        <Image Grid.Column="0" x:Name="sourceImage" Stretch="None" HorizontalAlignment="Center" VerticalAlignment="Center" />
        <Image Grid.Column="1" Source="/Assets/Checkerboard.png" Width="320" Height="320" Stretch="UniformToFill" HorizontalAlignment="Center" VerticalAlignment="Center" />
        <Image Grid.Column="1"  x:Name="targetImage" Stretch="None" HorizontalAlignment="Center" VerticalAlignment="Center" />
        <ScrollViewer Grid.Row="1" Grid.ColumnSpan="2" HorizontalScrollMode="Auto" HorizontalScrollBarVisibility="Auto" VerticalScrollMode="Disabled" VerticalScrollBarVisibility="Hidden">
            <StackPanel Orientation="Horizontal">
                <Image x:Name="o6" Grid.Row="6" Stretch="Uniform" HorizontalAlignment="Center" VerticalAlignment="Center" />
                <Image x:Name="o5" Grid.Row="5" Stretch="Uniform" HorizontalAlignment="Center" VerticalAlignment="Center" />
                <Image x:Name="o4" Grid.Row="4" Stretch="Uniform" HorizontalAlignment="Center" VerticalAlignment="Center" />
                <Image x:Name="o3" Grid.Row="3" Stretch="Uniform" HorizontalAlignment="Center" VerticalAlignment="Center" />
                <Image x:Name="o2" Grid.Row="2" Stretch="Uniform" HorizontalAlignment="Center" VerticalAlignment="Center" />
                <Image x:Name="o1" Grid.Row="1" Stretch="Uniform" HorizontalAlignment="Center" VerticalAlignment="Center" />
            </StackPanel>
        </ScrollViewer>
        <StackPanel Grid.Row="2" Orientation="Horizontal" HorizontalAlignment="Center" Margin="4" Grid.ColumnSpan="2">
            <Button Content="Go!" Padding="32,16" Margin="4" Click="Button_Click"/>
        </StackPanel>
    </Grid>
</Page>
Here you'll see that we add an Image named "sourceImage" which is used to display the input image and another Image named "targetImage" which is used to display the output. Behind these images I add additional Image elements which display a checkerboard pattern; this is to demonstrate opacity in the target image and is completely optional but should you wish to display these you can find the "Checkerboard.png" file here.
Underneath these images I add a horizontally oriented StackPanel containing further Image elements. These are used to display the intermediate results of the U²-Net architecture which I found very useful for debugging but again is completely optional as it has no bearing on the final output.
Finally, in the bottom row of the UI we have a StackPanel containing a singular Button displaying the content "Go!". This button will be used to load and display an image, perform inference and, finally, display the output image. We'll use the "Click" event to invoke this functionality in the "MainPage.xaml.cs" file as shown below:
using Microsoft.AI.MachineLearning;
using System;
using System.Threading.Tasks;
using Windows.Graphics.Imaging;
using Windows.Storage;
using Windows.Storage.Streams;
using Windows.UI.Xaml;
using Windows.UI.Xaml.Controls;
using Windows.UI.Xaml.Media.Imaging;

namespace UwpMl
{
    /// <summary>
    /// An empty page that can be used on its own or navigated to within a Frame.
    /// </summary>
    public sealed partial class MainPage : Page
    {
        public MainPage()
        {
            this.InitializeComponent();
        }

        private async void Button_Click(object sender, RoutedEventArgs e)
        {
            // Use Picket to get file
            var file = await GetImageFile();

            SoftwareBitmap softwareBitmap;
            byte[] bytes;


            // Load image & scale to tensor input dimensions
            using (IRandomAccessStream stream = await file.OpenAsync(FileAccessMode.Read))
            {
                bytes = await GetImageAsByteArrayAsync(stream, 320, 320, BitmapPixelFormat.Rgba8);
                softwareBitmap = await GetImageAsSoftwareBitmapAsync(stream, 320, 320, BitmapPixelFormat.Bgra8);
            }

            // Display source image
            var source = new SoftwareBitmapSource();
            await source.SetBitmapAsync(softwareBitmap);

            sourceImage.Source = source;

            // Convert rgba-rgba-...-rgba to bb...b-rr...r-gg...g as colour weighted tensor (0..1)
            var input = TensorFloat.CreateFromIterable(new long[] { 1, 3, 320, 320 }, TensorBrg(bytes));

            // Load model & perform inference
            StorageFile modelFile = await StorageFile.GetFileFromApplicationUriAsync(new Uri($"ms-appx:///Assets/u2net.onnx"));
            u2netModel model = await u2netModel.CreateFromStreamAsync(modelFile);
            u2netOutput output = await model.EvaluateAsync(new u2netInput { input = input });

            // Display intermediate results
            await ToImage(output.o6, o6);
            await ToImage(output.o5, o5);
            await ToImage(output.o4, o4);
            await ToImage(output.o3, o3);
            await ToImage(output.o2, o2);
            await ToImage(output.o1, o1);

            // Display final result using the tensor as alpha mask on source image
            await ToImage(bytes, output.o0, targetImage);
        }
    }
}
As you can see, quality has been traded for clarity here to ensure the flow of how an image is retrieved and passed to a u2netmodel instance is clear. Pasting this code into "MainPage.xaml.cs" will give you a bunch of red squigglies indicating undefined methods which we'll implement next, starting with the easy bits:
GetImageFile
private async Task<StorageFile> GetImageFile()
{
    var picker = new Windows.Storage.Pickers.FileOpenPicker();
    picker.ViewMode = Windows.Storage.Pickers.PickerViewMode.Thumbnail;
    picker.SuggestedStartLocation = Windows.Storage.Pickers.PickerLocationId.PicturesLibrary;
    picker.FileTypeFilter.Add(".jpg");
    picker.FileTypeFilter.Add(".jpeg");
    picker.FileTypeFilter.Add(".png");

    var file = await picker.PickSingleFileAsync();

    return file;
}
This code uses a file picker to allow the user to select the source image.
GetImageAsSoftwareBitmapAsync
private async Task<SoftwareBitmap> GetImageAsSoftwareBitmapAsync(IRandomAccessStream stream, uint width, uint height, BitmapPixelFormat pixelFormat)
{
    BitmapDecoder decoder = await BitmapDecoder.CreateAsync(stream);

    var transform = new BitmapTransform() { ScaledWidth = width, ScaledHeight = height, InterpolationMode = BitmapInterpolationMode.NearestNeighbor };
    var softwareBitmap = await decoder.GetSoftwareBitmapAsync(pixelFormat, BitmapAlphaMode.Premultiplied, transform, ExifOrientationMode.IgnoreExifOrientation, ColorManagementMode.DoNotColorManage);

    return softwareBitmap;
}
This code loads an image from the specified IRandomAccessStream and uses a BitmapTransform and a BitmapPixelFormat to transform the source image to the desired size and pixel format for displaying in the UI. Finally it returns a SoftwareBitmap which can be conveniently displayed.
GetImageAsByteArrayAsync
private async Task<byte[]> GetImageAsByteArrayAsync(IRandomAccessStream stream, uint width, uint height, BitmapPixelFormat pixelFormat)
{
    BitmapDecoder decoder = await BitmapDecoder.CreateAsync(stream);

    var transform = new BitmapTransform() { ScaledWidth = width, ScaledHeight = height, InterpolationMode = BitmapInterpolationMode.NearestNeighbor };
    var data = await decoder.GetPixelDataAsync(pixelFormat, BitmapAlphaMode.Premultiplied, transform, ExifOrientationMode.IgnoreExifOrientation, ColorManagementMode.DoNotColorManage);

    return data.DetachPixelData();
}
This code loads an image from the specified IRandomAccessStream and uses a BitmapTransform and a BitmapPixelFormat to transform the source image to the desired size and pixel format for convenient translation into our ONNX model. Finally it returns a byte[] representing the transformed image.
Now comes the tricky bits...
Transform the source image into U²-Net's input tensor.
To perform inference, the input image needs to be translated into a "Tensor". Don't let the terminology scare you here, a "tensor" is simply a multi-dimensional array of floating point numbers with a defined "shape" (i.e. the size of each dimension). We can see the desired "shape" of the input tensor by looking at the u2netInput class which contains the following:
public sealed class u2netInput
{
    public TensorFloat input; // shape(1,3,320,320)
}
In case it's not apparent, the sizes of each dimension relate to the values per pixel (3 - red, green & blue) along with the height (320 pixels) and width (320 pixels) dimensions of the source image. We needn't worry about the initial dimension here which - in this instance - just acts as a "container" for the other dimensions and will always have a size of 1.
Now, while translating our input image into this tensor, it's important to ensure we provide the tensor values in the format/order the underlying model expects them. Specifically here we must:
- Provide multiple greyscale images
Given the shape of this input tensor - (3, 320, 320) - we can see the model is expecting to see 3 greyscale images, sized 320x320 apiece, with each "grayscale" image calculated from one of the input image's colour channels. Furthermore, careful examination ofdata_loader.pyshows that the model is expecting these images in blue, red, green order. This means that our (scaled) input image needs to be translated such that the index [1,1,1] - which would ordinarily return the red component of the top left pixel - returns the blue component of the top left pixel instead, and the index [2,1,1] - which would return the red component of the second pixel from the left on the top row of the image - instead returns the red component of the top left pixel of the image. And so on and so forth. - "Normalize" pixel values
Pixels in our input image are in the Rgba8 format (as shown in the call toGetImageAsByteArrayAsync) meaning each pixel is composed of 4 channels (red, green, blue and alpha) and each channel is represented by a single byte ranging in value from 0 to 255. Each of these pixel values need to be translated into a value between 0 and 1 and "normalized" with a channel specific divisor.
I implement these considerations in the TensorBrg method as shown here:
public IEnumerable<float> TensorBrg(byte[] bytes)
{
    // Original in rgb (0,1,2), we want brg(2,0,1)

    // Return the blue channel
    for (int i = 2; i < bytes.Length; i += 4)
    {
        var b = Convert.ToSingle(((bytes[i] / 255.0) - 0.406) / 0.225);
        yield return b;
    }

    // Return the red channel
    for (int i = 0; i < bytes.Length; i += 4)
    {
        var r = Convert.ToSingle(((bytes[i] / 255.0) - 0.485) / 0.229);
        yield return r;
    }

    // Return the green channel
    for (int i = 1; i < bytes.Length; i += 4)
    {
        var g = Convert.ToSingle(((bytes[i] / 255.0) - 0.456) / 0.224);
        yield return g;
    }
}
This method uses the yield return keyword to return the result of the mapping as an IEnumerable
// Convert rgba-rgba-...-rgba to bb...b-rr...r-gg...g as colour weighted tensor (0..1)
TensorFloat input = TensorFloat.CreateFromIterable(new long[] { 1, 3, 320, 320 }, TensorBrg(bytes));
Perform inference
Now we have a tensor of the expected shape containing the expected values, we're able to use our ONNX model to perform inference. This is - thanks to the "Windows Machine Learning Code Generator" - extremely easy as shown below:
// Load model & perform inference
StorageFile modelFile = await StorageFile.GetFileFromApplicationUriAsync(new Uri($"ms-appx:///Assets/u2net.onnx"));
u2netModel model = await u2netModel.CreateFromStreamAsync(modelFile);
u2netOutput output = await model.EvaluateAsync(new u2netInput { input = input });
And that's it. We have successfully used an ONNX model to perform inference using a state-of-the-art machine learning model. Just one small thing left... interpreting the results.
Transform the source image into target image using U²-Net's output tensor as an alpha channel.
We have two methods left to implement: ToImage & ToBlendedImage. The first of these takes an output tensor and converts it to a grey scale image. This method is used with the "intermediate" output tensors to show the progression towards the result and is really just used for debugging purposes or out of interest. The code is shown here:
private async Task ToImage(TensorFloat tensorFloat, Image image)
{
    var pixels = tensorFloat
            .GetAsVectorView()
            .SelectMany(
                f =>
                {
                    byte v = Convert.ToByte(f * 255);
                    return new byte[] { v, v, v, 255 };
                })
            .ToArray();

    var writeableBitmap = new WriteableBitmap(320, 320);

    // Open a stream to copy the image contents to the WriteableBitmap's pixel buffer
    using (Stream stream = writeableBitmap.PixelBuffer.AsStream())
    {
        await stream.WriteAsync(pixels, 0, pixels.Length);
    }

    var dest = SoftwareBitmap.CreateCopyFromBuffer(writeableBitmap.PixelBuffer, BitmapPixelFormat.Bgra8, 320, 320, BitmapAlphaMode.Premultiplied);
    var destSouce = new SoftwareBitmapSource();
    await destSouce.SetBitmapAsync(dest);

    image.Source = destSouce;
}
Conversely, ToBlendedImage composes our desired output image by using the final output tensor of the U²-Net model as both a mask and an alpha channel for the input image. This is shown below:
private IEnumerable<byte> ApplyTensorAsMask(byte[] data, TensorFloat tensorFloat, float cutoff)
{
    var tensorData = tensorFloat.GetAsVectorView().ToArray();

    for (int i = 0; i < data.Length; i += 4)
    {
        var alpha = Math.Clamp(tensorData[i / 4], 0, 1);

        if (alpha > cutoff)
        {
            yield return Convert.ToByte(data[i + 2] * alpha);
            yield return Convert.ToByte(data[i + 1] * alpha);
            yield return Convert.ToByte(data[i + 0] * alpha);
            yield return Convert.ToByte(alpha * 255);
        }
        else
        {
            yield return 0;
            yield return 0;
            yield return 0;
            yield return 0;
        }

    }
}

private async Task ToBlendedImage(byte[] data, TensorFloat tensorFloat, Image target)
{
    var image = ApplyTensorAsMask(data, tensorFloat, 0.0f).ToArray();
    var writeableBitmap = new WriteableBitmap(320, 320);

    // Open a stream to copy the image contents to the WriteableBitmap's pixel buffer
    using (Stream stream = writeableBitmap.PixelBuffer.AsStream())
    {
        await stream.WriteAsync(image, 0, image.Length);
    }

    var dest = SoftwareBitmap.CreateCopyFromBuffer(writeableBitmap.PixelBuffer, BitmapPixelFormat.Bgra8, 320, 320, BitmapAlphaMode.Premultiplied);
    var destSouce = new SoftwareBitmapSource();
    await destSouce.SetBitmapAsync(dest);

    target.Source = destSouce;
}
With these methods implemented, there should be no more sqigglies in our MainPage.xaml.cs and we should be able to successfully compile and run the project.
Testing
Run the project and click the "Go!" button. While you are free to use any source image you like to test the code above, I would suggest that, when prompted for a source image, you use one of the test images provided by U²-Net; in the screen shot below I've used bike.jpg.
After selecting the image, it will be scaled and displayed in the UI before performing inference and displaying the output images. It should only take a few seconds for the output image to appear and, of this time, inference via the ONNX model should - depending on your hardware - be less than a second. This shows that there is significant potential for optimization in the preparation of the input tensor and the processing of the output tensor but, given premature optimisation is the root of all evil, I didn't attempt to optimize these processes and instead just focused on getting the solution running.
Anyway, once processing is complete, you should see something similar to this:
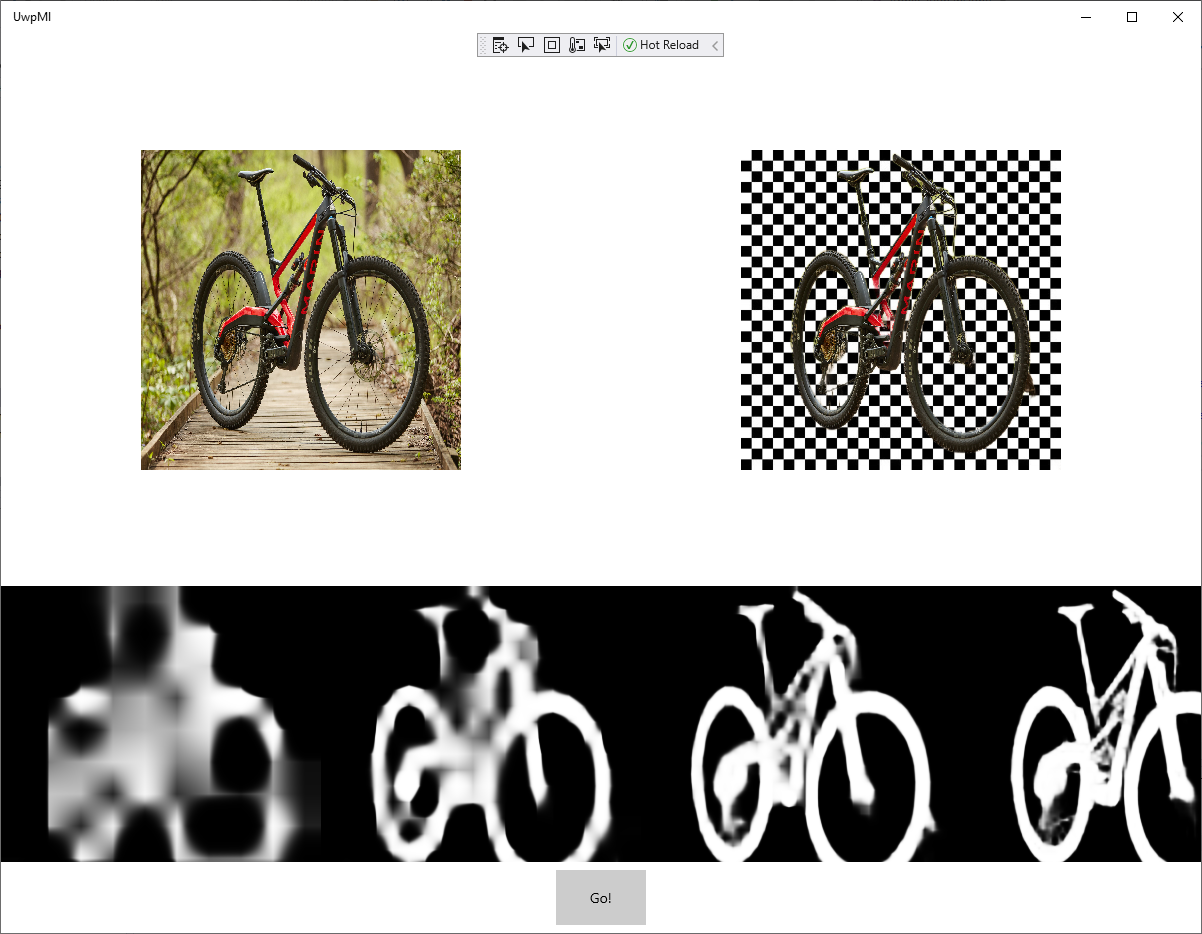
Nice! Let's compare it to the docker produced image of my girl above:
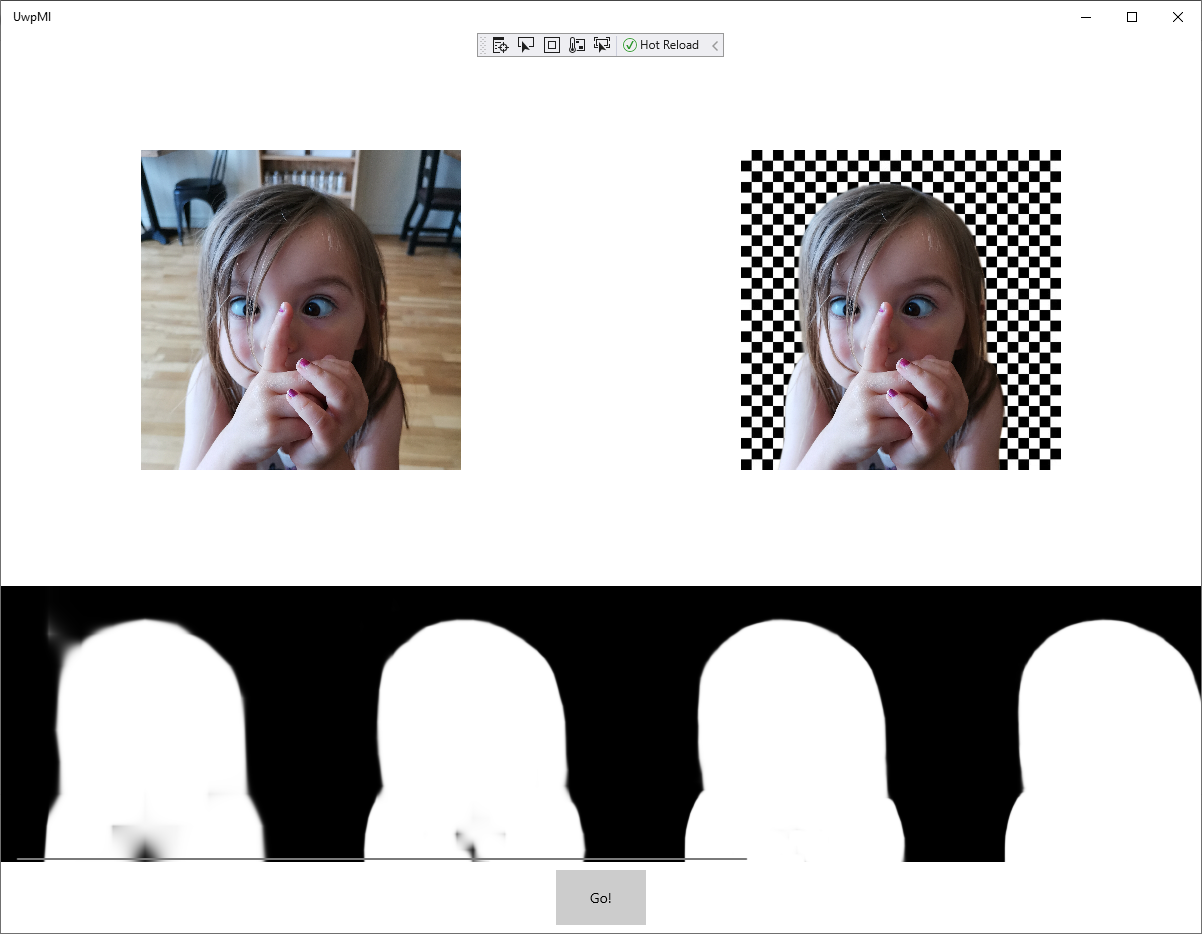
That is pretty good, just as fast as as the Docker solution and doesn't require an internet connection. Sweet!
Bonus
Now we're able to remove backgrounds using a state-of-the-art machine learning model both in and out of process, let's revisit the "Premier League Player of the Month" to see if we can easily create one of our own. Quickly combining the following XAML with a processed image of my boy gives us:
<Viewbox>
    <Canvas xmlns="http://schemas.microsoft.com/winfx/2006/xaml/presentation" xmlns:x="http://schemas.microsoft.com/winfx/2006/xaml" x:Name="Layer_3_0" Width="640.089" Height="896.125" Canvas.Left="0" Canvas.Top="0">
        <Path Width="594.812" Height="887.356" Canvas.Left="0.00104256" Canvas.Top="6.10352e-005" Stretch="Fill" Fill="#FF3C9A24" Data="..."/>
        <controls:DropShadowPanel BlurRadius="50.0" ShadowOpacity="0.80" OffsetX="114.0" OffsetY="0.0" Color="#AF000000">
            <Image Source="Assets/Poopi.png" Width="640" Height="547" />
        </controls:DropShadowPanel>
        <Rectangle Width="595" Height="50" Canvas.Top="494" >
            <Rectangle.Fill>
                <LinearGradientBrush EndPoint="0.5,1" StartPoint="0.5,0">
                    <GradientStop Color="#00000000"/>
                    <GradientStop Color="#7F000000" Offset="1"/>
                </LinearGradientBrush>
            </Rectangle.Fill>
        </Rectangle>
        <Canvas x:Name="Layer_4" Width="640.089" Height="855" Canvas.Left="0" Canvas.Top="91">
            <Path Width="868.328" Height="171.341" Canvas.Left="-138.987" Canvas.Top="437.023" Stretch="Fill" Fill="#FFD7533E" Data="..."/>
        </Canvas>
        <TextBlock Text="POOPI" Canvas.Left="29" Canvas.Top="553" Height="119" Width="532" FontFamily="Impact" FontSize="96" Foreground="White" TextAlignment="Center" />
    </Canvas>
</Viewbox>
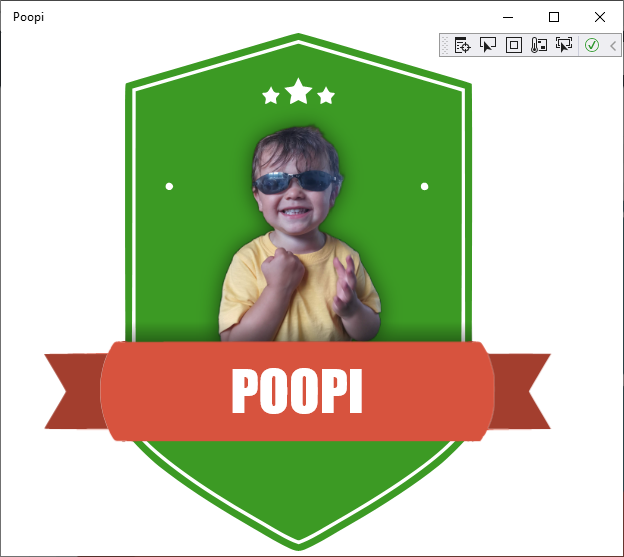
Yup, that works.
(Sorry son but, after what happened Sunday, you deserve it ;0)
Conclusion
As you can see, using state-of-the machine learning models from UWP is fairly straight forward and certainly not any more complicated than using them from Python. UWP - via "Microsoft.AI.MachineLearning" - has excellent support for the very latest versions of ONNX and, given most mainstream machine learning frameworks can export to ONNX, allows UWP developers to easily leverage the entire vista of modern machine learning algorithms for their purposes (resources permitting).
The source code for this article can be found in my UwpMl repository on GitHub; please star it if you find it helpful or informative. Should you have any questions or comments, please feel free to drop me a line using any of the links below or from my about page.